How to convert PowerPoint to DVD
This tutorial will guide you how to convert PowerPoint files to DVD discs by using 4Media PowerPoint to DVD and take presentations on DVD players.
Basic PowerPoint to DVD Conversion How-to
Further Useful Functions: make customized PowerPoint Presentation DVD
How to convert PowerPoint to DVD using 4Media PowerPoint to DVD
Step 1: Start
Download, install and launch 4Media PowerPoint to DVD.
Step 2: Add PPT Files(s)
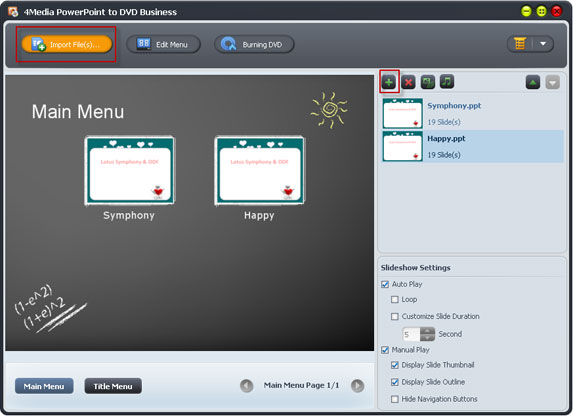
Drag and drop PowerPoint file(s) into file list or Click "Import File(s)" button to add PPT file(s).
Step 3: Adjust Slideshow Settings
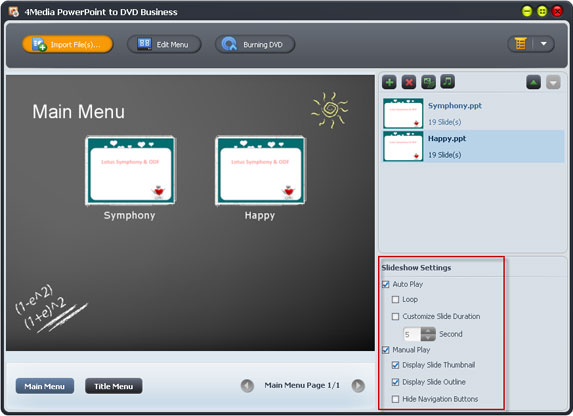
Adjust slideshow settings to play automatically or manually.
Tips:
1. In Auto-play mode, you can set the slide to play in loop or customize slide duration.
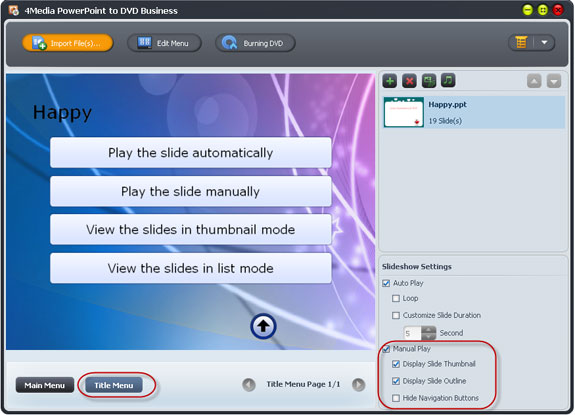
2. In Manual play mode, you can decide to display the slides in thumbnail or outline view. You can also hide the navigation buttons at will. You can preview the applied effects of different menu templates by click "Title Menu" at the bottom of application.
Step 4: Create and Design a DVD Menu
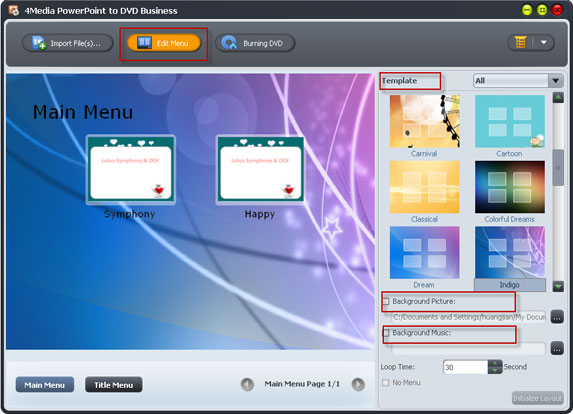
Click "Edit Menu" button to create and design a DVD menu. Choose one menu template and add background music/picture into it.
Step 5: Start to Burn
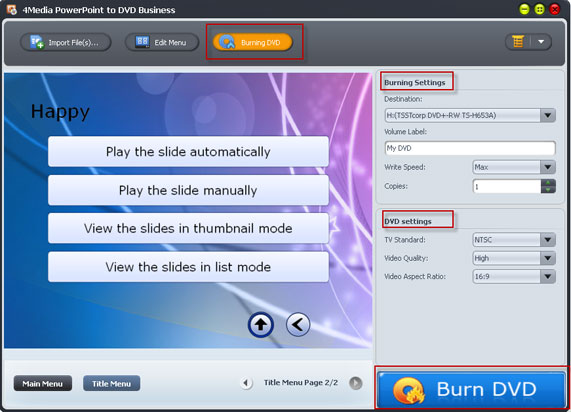
Click "Burning DVD" button at the top of the application and hit "Burn DVD" button at the bottom to start burning!
Tips:
Burning settings are provided, such as volume label, write speed, copies. DVD settings can be adjusted as well, including TV standard, video quality and video aspect ratio.
How to Record Narration in Presentation Rehearsal?
Record a voice narration into your PowerPoint file easily as an instruction by the following steps:
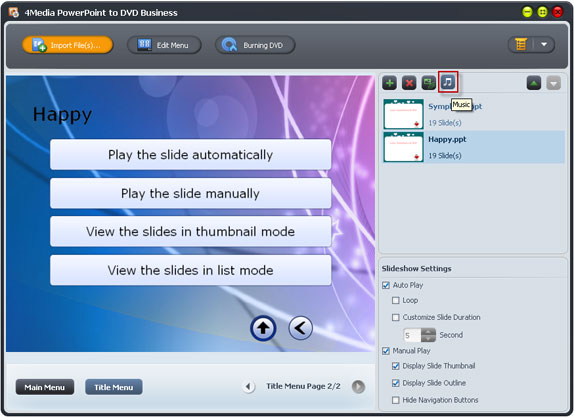
1. Select the PowerPoint file needs to add narration and click![]() button.
button.
2. In Auto-Play mode, check "Presentation Recording" option and enter rehearsing process to preview PowerPoint file in full screen.
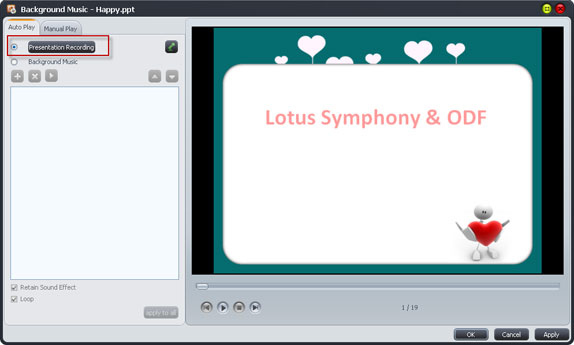
Click "Presentaion Recording" button to start recording narration.

And click "Stop Recording" button to end the narration.


If you want to logo your PowerPoint file, please follow the below steps to add text/picture watermark into it.
1. Highlight the PowerPoint file needed to add watermark into and click "Watermark" button on the left of the main interface.
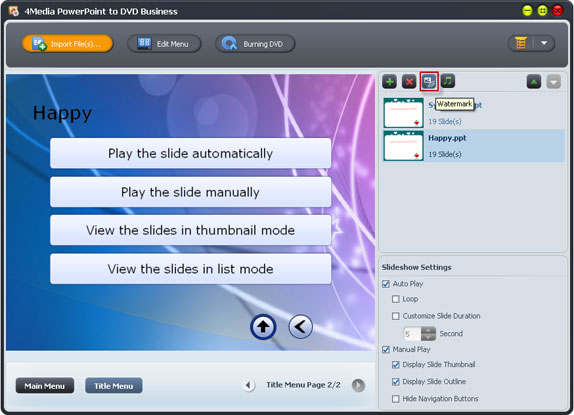
2. Click "Add Text Watermark" or "Add Picture Watermark".
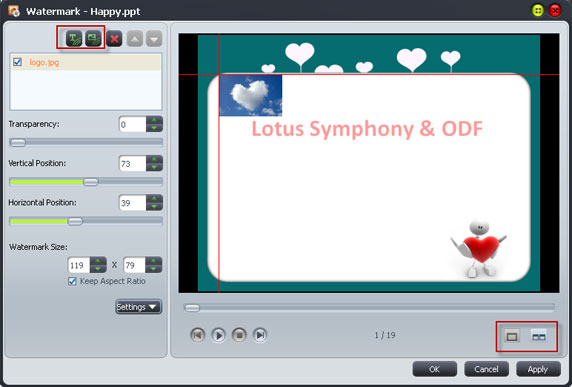
3. Set Transparency, Position, Font, Color, Size, or Style for watermark, play and preview slide show in comparison.
4. Click "Apply" and "OK" to finish editing.
Featured Guides
Guides Categories
Video/Audio Guides
- 4Media Audio Converter Pro Tutorial
- 4Media Movie Editor 6 Tutorial
- Video Converter Ultimate Tutorial
- How to convert DAT to other videos
DVD/CD/Blu-Ray Guides
- 4Media Blu Ray Converter for Mac Tutorial
- How to convert Blu-ray disc to video files
- How to burn AVI, MPEG, VOB, DAT, M2V, MPG to DVD on Mac
- How to burn DivX to DVD on Mac
iPod Guides
- 4Media iPod Max Guide
- How to convert AVI, MPEG to iPod MP4 format
- Guide: 4Media iPod to PC Transfer
- How to convert DVD to iPod on Mac
iPhone Guides
- 4Media iPhone Contacts Transfer for Mac Tutorial
- 4Media iPhone Contacts Transfer Tutorial
- 4Media iPhone Ringtone Maker for Mac Tutorial
- 4Media iPhone Max Guide
iPad Guides
Youtube/Online Video Guides
- 4Media Online Video Converter for Mac Guide
- 4Media Online Video Downloader for Mac Guide
- 4Media Online Video Converter Guide
- 4Media Online Video Downloader Guide
PPT/PDF Guides
Others
Articles
- How to download YouTube videos for free
- How to download/convert YouTube videos to iPod
- How to download and convert YouTube videos
- All features of apple iPhone
- Now you can get more TV offerings from Apple iTunes
- Video Streamer HAVA from Snappy Multimedia
- iPod Growth Driving Demand for Flash Memory
- MediaMan HVX-3500 Review
- Uncertain whether new iPod will be delayed or not because of hurdles
- T3's top five iPod alternatives
- Envivio Exhibits MPEG-4 Solutions from Mobile to HD at CCBN2006

