How to edit/crop/join DVD movie on Mac OS X
This step-by-step guide will show you how to use 4Media DVD to Video Ultimate for Mac to edit general DVD (copy-protected included) on Mac OS X (Leopard Supported).
What you need is 4media DVD to Video Ultimate for Mac; you can download it directly for free from here:
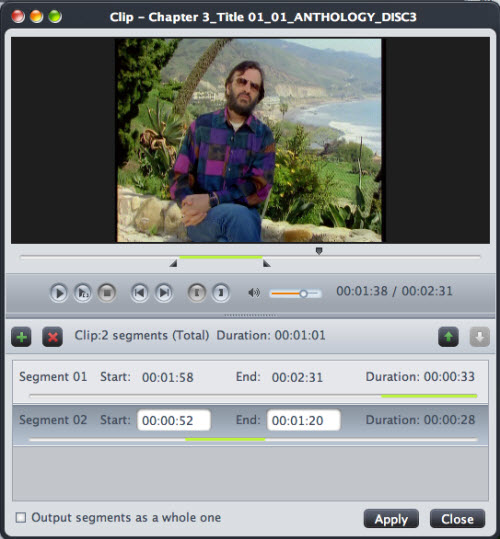
If you want to split a particular part of the DVD movie, you can click “Clip” to customize the conversion time, there will be a timeline below the preview window, you can click the line and set the conversion start time and end time.

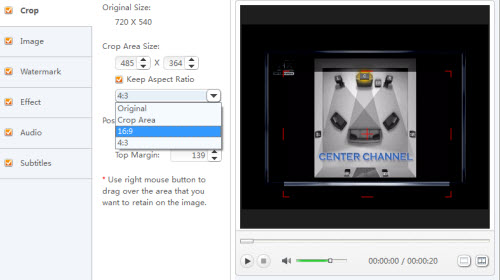
Before you convert the VD file, you can choose to “Split” in “Basic Setting” to 10 MB, 100 MB, 200 MB, CD-R/RW 650 MB, CD-R/RW 702 MB, CD-R/RW 790 MB, CD-R/RW 870 MB, DVD±R/RW 4.7 GB, DVD±R/RW DL 8.5 GB AND 10 Seconds. If you want to cut the edges of the DVD movie, you can click the “Effect” button, and then you will see a pop up windows (See the figure below). You can see the option “Position of Crop Area”; fill or choose the number in the blank to cut the edges. Moreover, there is an oblong in dashed line around the movie video. You can select an output aspect ratio and the available options are: Keep Original, full screen, 16:9 and 4:3. Also the dashed line can be moved by hand.

You can also click the “Effect” button and customize the images’ brightness, saturation, contrast; add watermark, etc (See the figure below).

You can even apply special effects such as “Black and White”, “Oil Painting”, “Line Drawing”, “Negative”, “Embossment”, “Old Film”, “Shadow”, “Haze”, “Mosaic”, “Flip Horizontal”, “Flip Vertical”, “Vertical Blind”, “Horizontal Blind” and “Sand” by selecting an effect from drop-down list.


